A Beginner's Guide to Formatting Windows -Part 3. Installing Windows | Resetting


This is finally the last part of the series.
Last time, we covered how to make a bootable USB drive, how to format your drive, and
even why you'd want to do it in the first place.
- 컴알못 초보자를 위한 윈도우 포맷하는 법 -1.부팅디스크 만들기
- 컴알못 초보자를 위한 윈도우 포맷하는 법 -2.포맷하기
- 컴알못 초보자를 위한 윈도우 포맷하는 법 -3.윈도우 설치 | 재설정
If you've followed along through Part 2,
your computer should now be in a state where
the Windows installation files are properly saved on the hard drive, right?

Saved right there on the hard drive!!
Now let's finish up the Windows installation.
Part 3 > Installing Windows
Once the Windows installation files are successfully
installed from the boot drive to the hard drive,
when you boot from the hard drive,
you'll see the following initial screens.
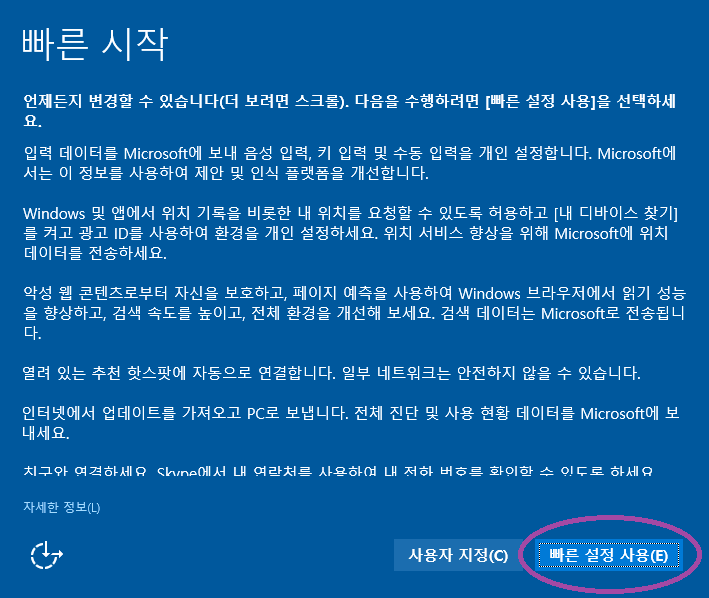
If there's nothing in particular you need to configure,
you can just click "Use Express settings."
(You haven't forgotten that Alt + E is the shortcut, right?)
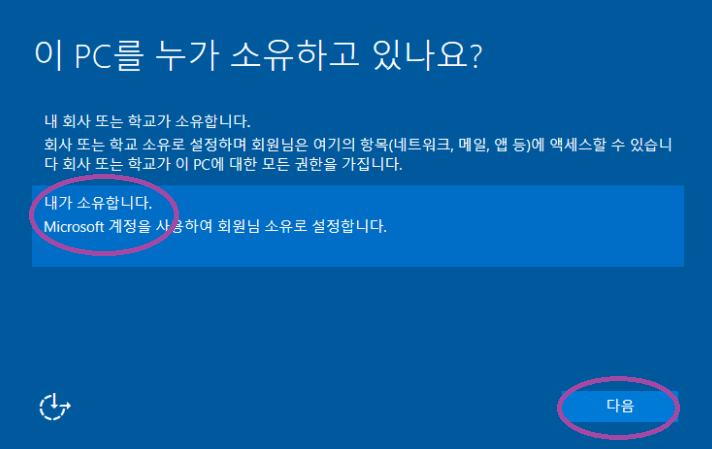
Since this is a personal PC,
please select "I own it."
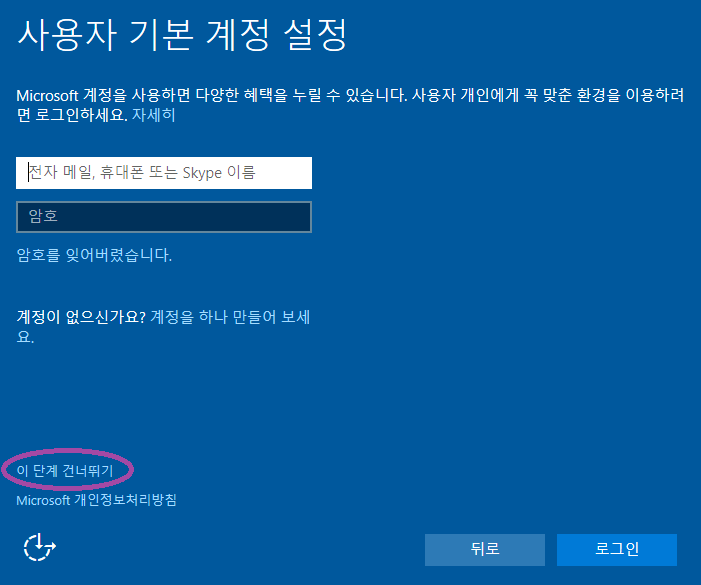
The default user account setup page will appear.
If you have a Microsoft account, go ahead and sign in with it,
and if you'd like to create one, feel free to create it and sign in as well.
If that sounds like too much of a hassle,
you can just skip this step and set up a local (offline) account instead.
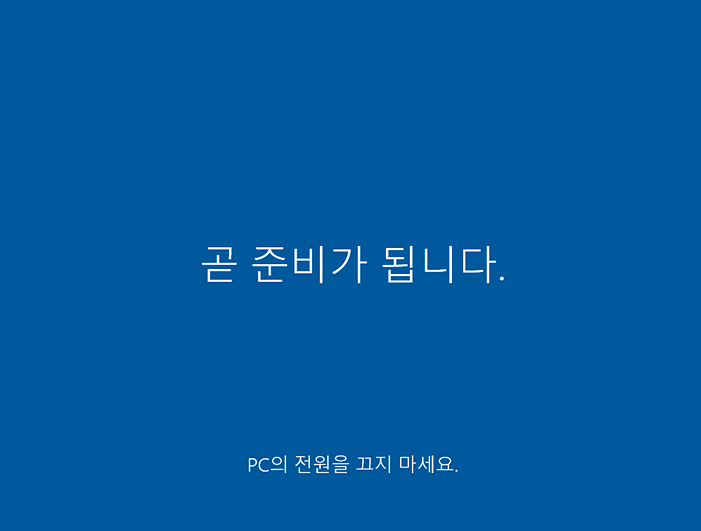
What a convenient world we live in.
It installs everything on its own automatically.
And that's it — you're done.
Bonus > Resetting/Reinstalling Windows 10
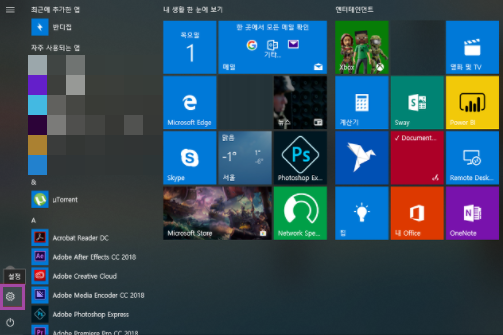
If you click the Start button, you'll see a gear-shaped icon.
That's the Settings button.
Alternatively, if you press the Windows key + X, the following menu will pop up.
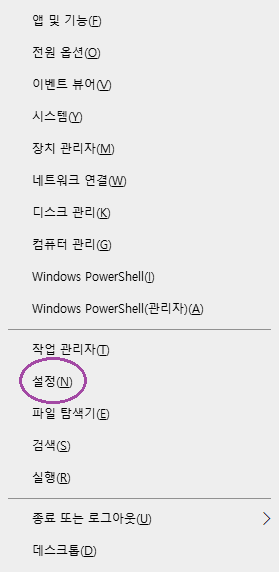
From here, click Settings, or press Alt + N.
That will bring up the following settings window.
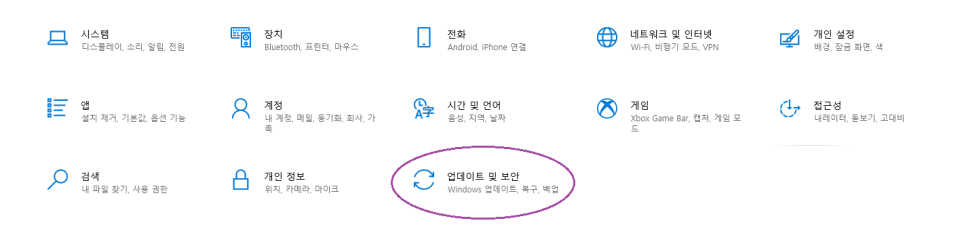
From here, go into "Update & Security."
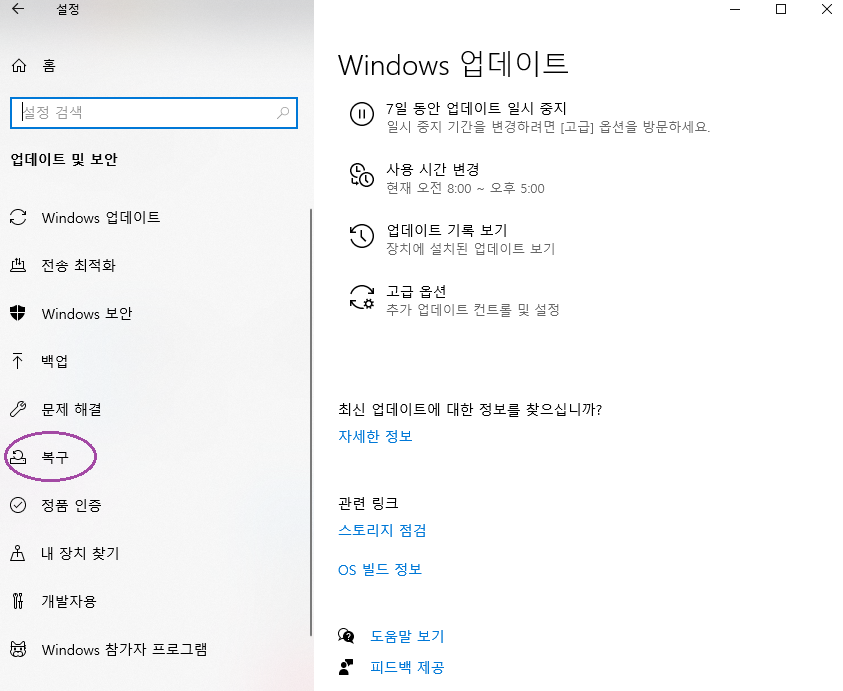
From the menu on the left, go into "Recovery."
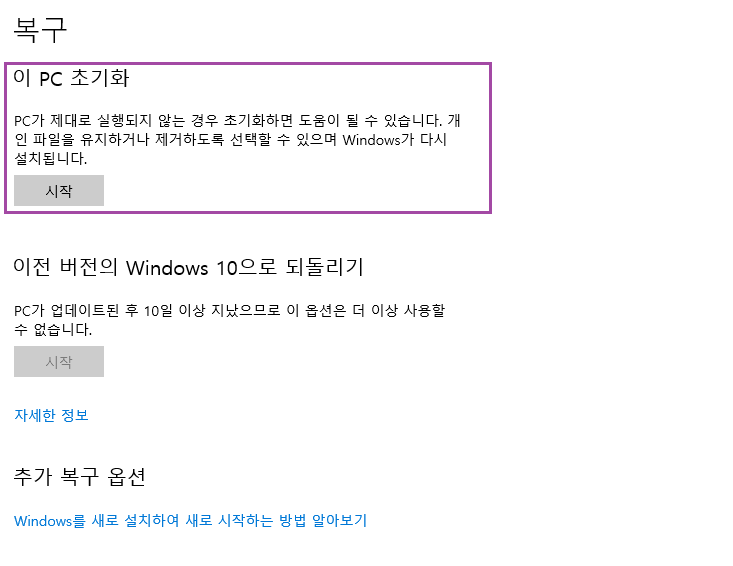
Then just go ahead with "Reset this PC."
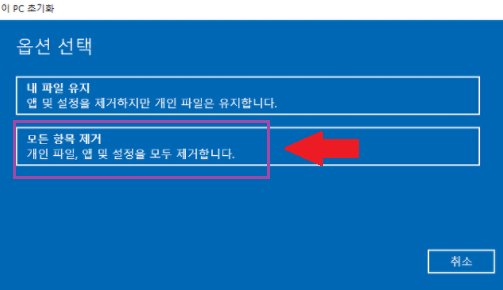
There are two options here.
If you choose "Remove everything,"
all your files will be deleted and Windows will be reset to its freshly installed state.
You can think of it as being similar to a factory reset.
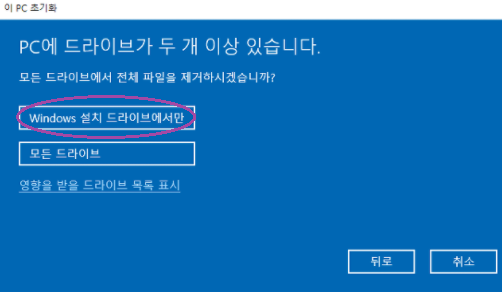
If, like me, you have your drive partitioned, or split into C and D drives,
the following screen will appear.
The first option only resets the C drive, where Windows is installed,
while choosing the second option resets every drive, wiping out all files.
In other words, if you have important files,
you need to back them up beforehand,
and if you've already backed everything up to your D drive,
you should only reset the "Windows installation drive."
Otherwise, the D drive will get reset along with it,
which would make the whole backup pointless, right??

Whenever you reset, always make sure to
double- and triple-check that your important files are properly backed up before proceeding.
Things like documents you're working on, digital certificates,
or any other precious files.
Now, after reviewing the precautions
and moving on to the next step,
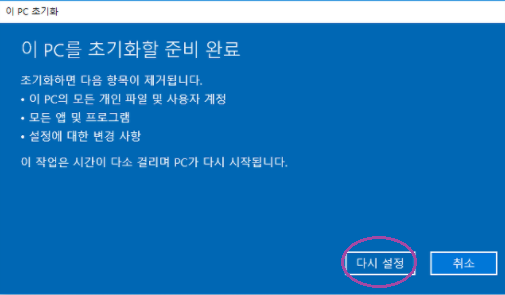
everything will be ready to go.
Once you click "Reset,"
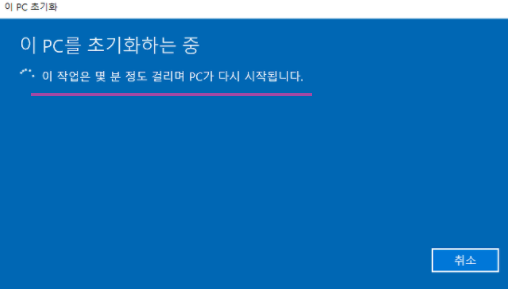
the reset process will begin.
Since it proceeds automatically, just make sure your computer doesn't get forcibly shut down in the middle of it.
Your computer will take care of everything else for you.

Truly, what a convenient world we live in.
댓글 0